


Document Actions
gvSIG-Desktop 1.10. Nuevas funcionalidades
The first step to create a model is to define the inputs it needs. The following elements are found in the Inputs tabs on the left side of the modeler window:
- Band
- Raster layer
- Vector layer
- String
- Table field
- Coordinate (Point)
- Table
- Fixed table
- Multiple input
- Selection
- Numerical value
- Boolean value
Double-clicking on any of them, a dialog is shown to define its characteristics. Depending on the parameter itself, the dialog will contain just one basic element (the description, which is what the user will see when executing the model) or more of them. For instance, when adding a numerical value, as can be seen in the next figure, apart from the description of the parameter is needed to set a default value, the type of numerical value and a range of valid values.

SEXTANTE modeler window for adding values
For each added input, a new element is added to the modeler canvas.
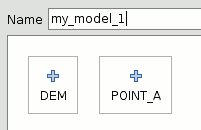
SEXTANTE modeler elements


